A House In The Trees Part XII

After a stalled few weeks of Tree House building due to Woodworking in America and Hurricane Sandy, I managed to get back out to work last week.
After cutting all the T1-11 sheathing/siding to length, I managed to get 2-1/2 walls hung. Hopefully next weekend Ill get to finish closing in the envelope.
The 4" x 6" which will make the new permanent supports are ready to go. Next weekend Ill begin digging out for the posts. Once theyre attached - hopefully this month - well be back on track to paint the sides and install the decking.
Read More..

The hall tree now has color

?The hall tree has been stained!  Saturday morning I sanded down the back piece that goes under the top shelf and then glued and screwed it in place.  I had to drive out of town for my nephews birthday party and by the time we got home and got everybody in bed and I got out to the garage it was 11:15 pm.  I turned on the radio and the fan and got started.  I wore latex gloves and used 1 lint free cloth to rub in the stain and another to wipe it smooth.  When I was finished and looked up at the clock it was 1:00 am.  I guess I was just in the zone.  Next time I think I will use a small foam brush to get the inside corners and edges where 2 boards meet.  I am also going to buy some heavier duty gloves.  I tore out the end of the index finger on my right had 3 times.  I plan on putting the 1st coat of polyurethane on tonight and have no idea how I am going to do it.  Wish me luck!
Read More..

Shop Tour M Scott Morton Part III

In addition to the free formed conversation I had with Morton while touring his shop, I also emailed him a formal questionnaire. Here, my friends are his actual, factual answers about his shop.
Penultimate Woodshop: Did you plan our your shop layout, or did it just evolve in and ad-hoc fashion?Morton: I try to plan, but it’s been ad-hoc as space has opened up, added new tools, etc.PW: Whate is your favorite area of the shop? Least favorite?Morton: Favorite area is around the assembly table, because everything is there, organized and I constantly work there. Least favorite is anywhere near the dust collector and it’s assorted hoses and dust.PW: Shop furniture, build or buy?Morton: Mostly built. I would prefer to buy, but everthing needs to be “just so” to either fit or fit my needs. But for jigs and accessories, I’d rather buy.
PW: Workbench, build or buy? What style? Would you change anything about it?Morton: I have my torsion box assembly table that doubles as a workbench. Need to change quite a bit out it in terms of work holding, but it works really well. However, I’m building a Roubo this winter (or spring or summer - PW) - so that will of course be my main bench and the assembly tale can just be that: assembly. The split-top Roubo will be made from Douglas Fir and will be very out-of-the-box, no real modifications.PW: Do you condition the air? Heat/AC/Dehumidifier?Morton: The shop is in the basement, about 75% buried underground or surrounded by heated (house) space. It maintains a temp at about 70 all year round. I use a dehumidifier in the summer as I get significant rust problems (no water problem, but lots of humidity).PW: Favorite activity in the shop?Morton: Re-organizing ;) or building prototypes.PW: What tool do you own the most of?Morton: Clamps (if they are a tool). Otherwise, funny - I hardley even have TWO of anyting - not even a drill/dirver or router [one each].
Morton’s Shop Technical Details:Size: About 30’ x 30’Attached or Outbuilding: BasementLighting Type: Overhead Flourescent -- added a few more fixtures myself and want to add even more.Heated? A/C?: No heating or AC. Stays about 70 all year round due to some sides being buried and others adjacent to heated spaces.
Read More..

The Ply Wooden Boat Part I Conception of a Crazy Idea

In September of 2011 Marc Spagnolo blogged about the plywood boat they made on GardenFork.tv. Entrigued, I watched the GardenFork.tv video and fell in love the idea. How could I say no to making a simple, functional boat out of nothing but plywood, screws, caulking and some very simple carpentry tools?
I couldn’t. So, I decided it would be the perfect family activity for our annual vacation in Lake George the following August.My plan was to pack a tool bag with the smallest tool kit possible. Then, once we were up at Lake George, I would buy the material locally, build the boat, use it in the lake and then scrap it when we were ready to go home.In order to determine the tool kit (I didn’t want to be short a needed tool or schelp unnecessary tools to and from Lake George) I first set about building a mock plywood boat.For the mock boat I used a sheet of ¼” luan plywood and some 1x3 as battens. I used my Makita 6½” 18v Li-Ion saw with a Freud ATB framing blade. I marked line with a chalk line and then cut them by eye. I screwed the whole thing together using Kreg screws so I wouldn’t have to pre-drill anything.
Much of my tool kit (and the boat making materials).
With the mock boat constructed, I packed up my Makita saw, my 12v drill, a chalk line, some clamps, a cheap plastic framing square, my Kreg screws and a handful of other small tools. I had the basic build figured out. It was time to go on vacation and build the actual boat.Before I get too far into my odyssey, heres the video that started me on my choice.
Read More..

Benchtop Bench Photo Essay

Ive spent the last few nights working on this bench into the wee hours in the morning. Ill write a proper post about it once Im done.
Read More..

A House In The Trees Part XI

With the roof sheathing complete and papered in, its time to turn my attention to the walls. Before I can sheath them, I have to waterproof the edge of the plywood flooring to prevent water absorption that would lead to dreaded delamination.
For more tree house posts, click here.
Read More..

Building The Wine Rack Part II

Fabrication: Initial Cutting & Setup
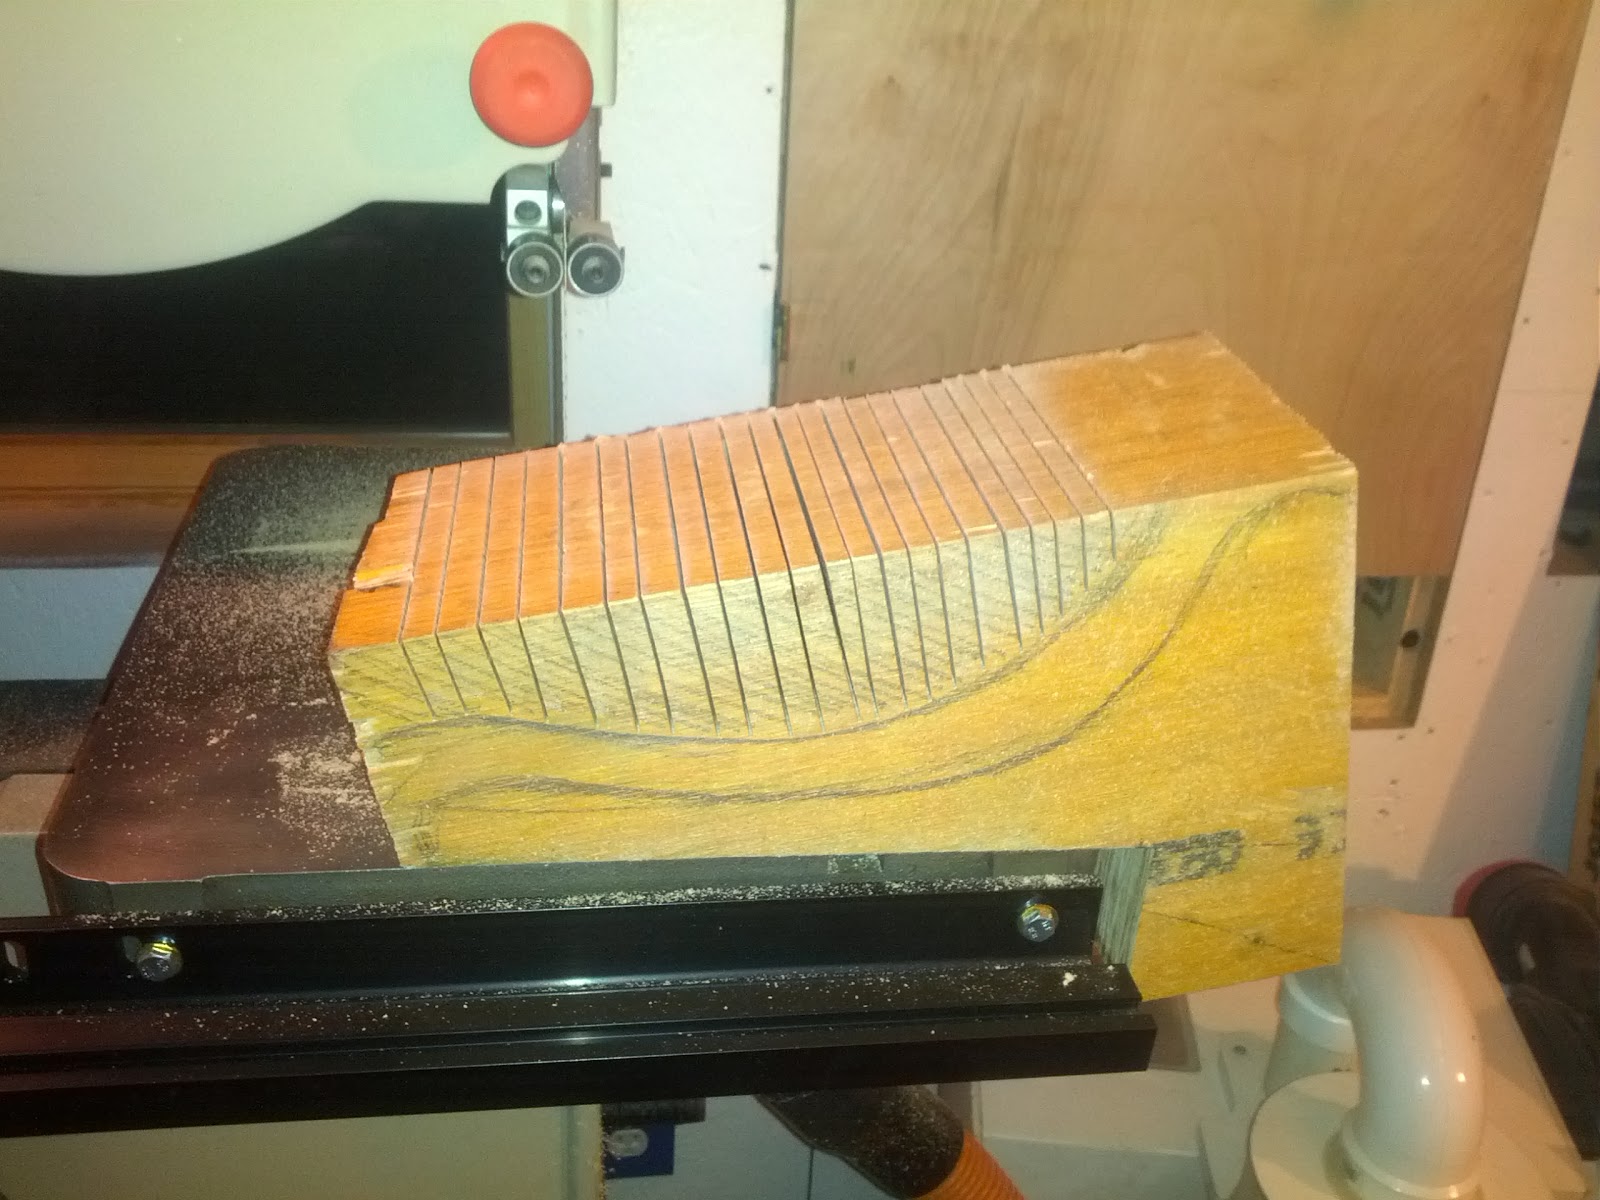
Once I had the design sketched out on the LVL I began by making relief cuts in the back face which would make the concave curved cut easier.
These Relief Cuts Will Make Cutting The Rear Curve Easier.
I did all my cutting on the band saw. This was the first project I made using my new Carter Guides. I won’t say they turn my crappy Ridgid band saw into a super star, but they do make it usable and predictable. For that, I give them credit and appreciation.
Once I had made the relief cuts, it occurred to me that a square block would be much easier to clamp and work then a curved one. Thankfully I thought of this when I did and left the back square (if slotted) for the time being.
Next, I cut out the “L” shape on the inside face. This too was easily done on the band saw using the Carter Guide. Though an “L” because the back and base are at 90° to each other, they are both reclined slightly to hold the bottle at a slight back tilt.
The Basic L.
Once the “L” was cut out of the inside face, I got ready to sculpt the concave face of the back. Having picked up an ArborTech Turbo Plane and a Saburrtooth Extra Coarse donut wheel since my last power sculpted project, I began the sculpting on a practice piece. When I was done I had tried the Turbo Plane, Saburrtooth wheel, my Festool RAS 115 and my medium grit Kutzall wheel. While the Turbo Plane and Saburrtooth have some potential and the RAS 115 is a great tool for finer shaping, I ended up preferring the moderate material removal rate, controllability and smooth resulting finish of the Kutzall. To paraphrase Paul Lemiski, the Kutzall is awesome.
The Saburrtooth Extra Coarse Proved Too Aggressive.
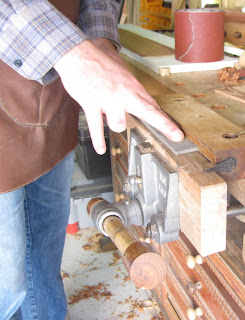
With the sculpting tool decided on, I took a scrap piece of 1x3 and screwed a very small piece of OSB to the end. Then I took the wine rack and placed it on the OSB. I secured it by screwing up through the OSB into the bottom of the wine rack. This firmly attached the 1x3 and allowed me to easily hold the rack in position with my bench vise.
Catch all the Wine Rack Posts Here.
Dont forget about the +Modern Woodworkers Association Podcast. We talk woodworking with Guests from around the world of woodworking every other week. Subscribe to the RSS feed or iTunes today.
Read More..

Google Comments

As the Penultimate Woodshop is a Blogger blog, its easy for me to integrate with Google+ using Google+ comments. Google+ comments mean that comments to a blog post or to the corresponding Google+ post will show at both locations.
Should I use Standard Blogger Comments, Google+
Integrated Comments or would you rather mail in
a comments form?
When Google+ comments first came out, I tried them out. I found that they allowed for much more interaction around posts and more conversation.
As much as I liked this, I turned them off when I found that they required a Google account in order to comment (no more anonymous).
Since then Ive watched, and almost all of the comments I receive are from people with Google accounts. So, Im turning Google+ comments back on. I really enjoyed the increased comments.
While doing this, Im not looking to exclude anyone. So, if you find that youre not able to comment because you dont have a Google account, please email me. If I find that Google+ comments is causing problems, or disenfranchising my audience, I will turn them off again. As far as Im concerned the increased conversation is nice, but not at the expense of others ability to comment.
So please, if you find the Google+ comments a problem, let me know. Otherwise, please join in the conversation.
Read More..

Mallet handle shaping ideas

I took a better look at the mallet handle this morning.  The thicker part of the shoulder is 3/8" and the thinner part is 1/8".  I am thinking that I will run the thicker part through the tablesaw and bring both sides down to 1/8".  I dont have a bandsaw to cut the sides in to fit my hand better so I am probably going to trim the corners on the router table with a chamfer bit and then just sand the heck out of it with some 60 grit paper.?  I was also looking through my scraps and found the piece of oak left over from where I put the BBs inside the head.  I think that I should be able to make the wedges for the top of the handle from that.
Read More..

The Woodchat Telephone Game Part I The Game

Chris, Matt and Scott, the three (3) woodworking super nerds who run +Woodchat,  the weekly woodworking discussion on Twitter and Google+ are currently in the middle of their telephone design game. In the words of +Chris Wong:
You know what the Telephone Game is, right?  One person starts by whispering a phrase into the next person’s ear and that person whispers what they heard to the next person and this continues down the line.  By the time the phrase passes through all the players, it is totally different. 
Wouldn’t it be fun to try something like that with furniture design?
They decided to find out.
Since May 29th they have been passing the design from participant to participant with each one having a week to make their changes to the previous design. I was lucky enough to be invited to participate and foolish enough to accept.
I tried to follow the structure of a Telephone Game and I only focused on the previous version (+Megan Fitzpatrick’s) when I was making my design. It proved to be a challenging and enjoyable process.
My Telephone Design Game design.
I’ll elaborate on how I came upon the design I did in a separate post. In the meantime, be sure to follow along every Wednesday at 10:00 Eastern to see that week’s contestant share and discuss his or her design. If you’re up to it, you can even sign up to participate. You’ll have fun if you do.
Read More..

Together for Ever!

Should have more than a one hundred years these tongue and groove planes. I picked up them from ebay, maybe they come from Austria or Germany. No marks on the plane body, neither on the blades.They cut a 8 mm tongue and groove.
When I had them I noticed they needed a restoring job. The plane body showed numerous worm holes, although the wood was solid enough.
The main problem was that the wooden screws was blocked into the body and for two of them I cannot unscrew. The only solution was sawing the plane body for reach the thread and release the screw. The damage was inevitable and a repair needed!I dislike to have these tools only for collecting them; I love to use them too. So I attempted to a structural and functional recovery, preserving, if possible, their lived-in look with some sign of aging
After washing with soap and treated with an anti-worm product (although the old holes seemed empty), blades and steel skates received a anti-rust treatment.
The pieces were then re-glued and veneers were used for closing the saw grooves. Then I closed the worm holes, leaving some intentionally.
The functional recovery concerned after all in to steady contact points (soles and fences). For this job I used mahogany strips. This wood is also present in the wedges and regulating screws.
The skate bed and sides were rectified by a big file and by sliding the plow on the abrasive paper while keeping it square.
The two half-skates are inserted into a groove of plane body. At heel ant toe, the skates have dovetail shape and are firmly held by a nail driven into the body.
One wooden screw has split while removing it and I had to repair by gluing.
All screws had difficulties to move in their threads, so I used a thin cylindric rasp for easy their action.
Blades are hand forged; the plow plane blade was worn-out, so I had to substitute it.I started from a 32 mm single plane iron, cut by a angle grinder (cooling often) and refinished at bench grinder.
By looking at old blade, it shows a trapezoidal section and slightly tapered sides; this avoids the cutter binds into the groove walls, even if the plane rocks a bit.
Moreover, the original blades show a convex shape for a stronger holding of them by wedge; I imitate this for the new blade and it works. 
Finally, I rectified the contact surfaces (soles and fences) for having the cutting edge square to the fence and parallel to the sole. Of course I tried to cut a joint.
 
Read More..