Penultimate Woodshop Renovation Video 11

Its been a hectic few weeks here. While I cant say its been busier than usual, my holiday schedule has been a lot less predictable.
The caddies and my messy bench.
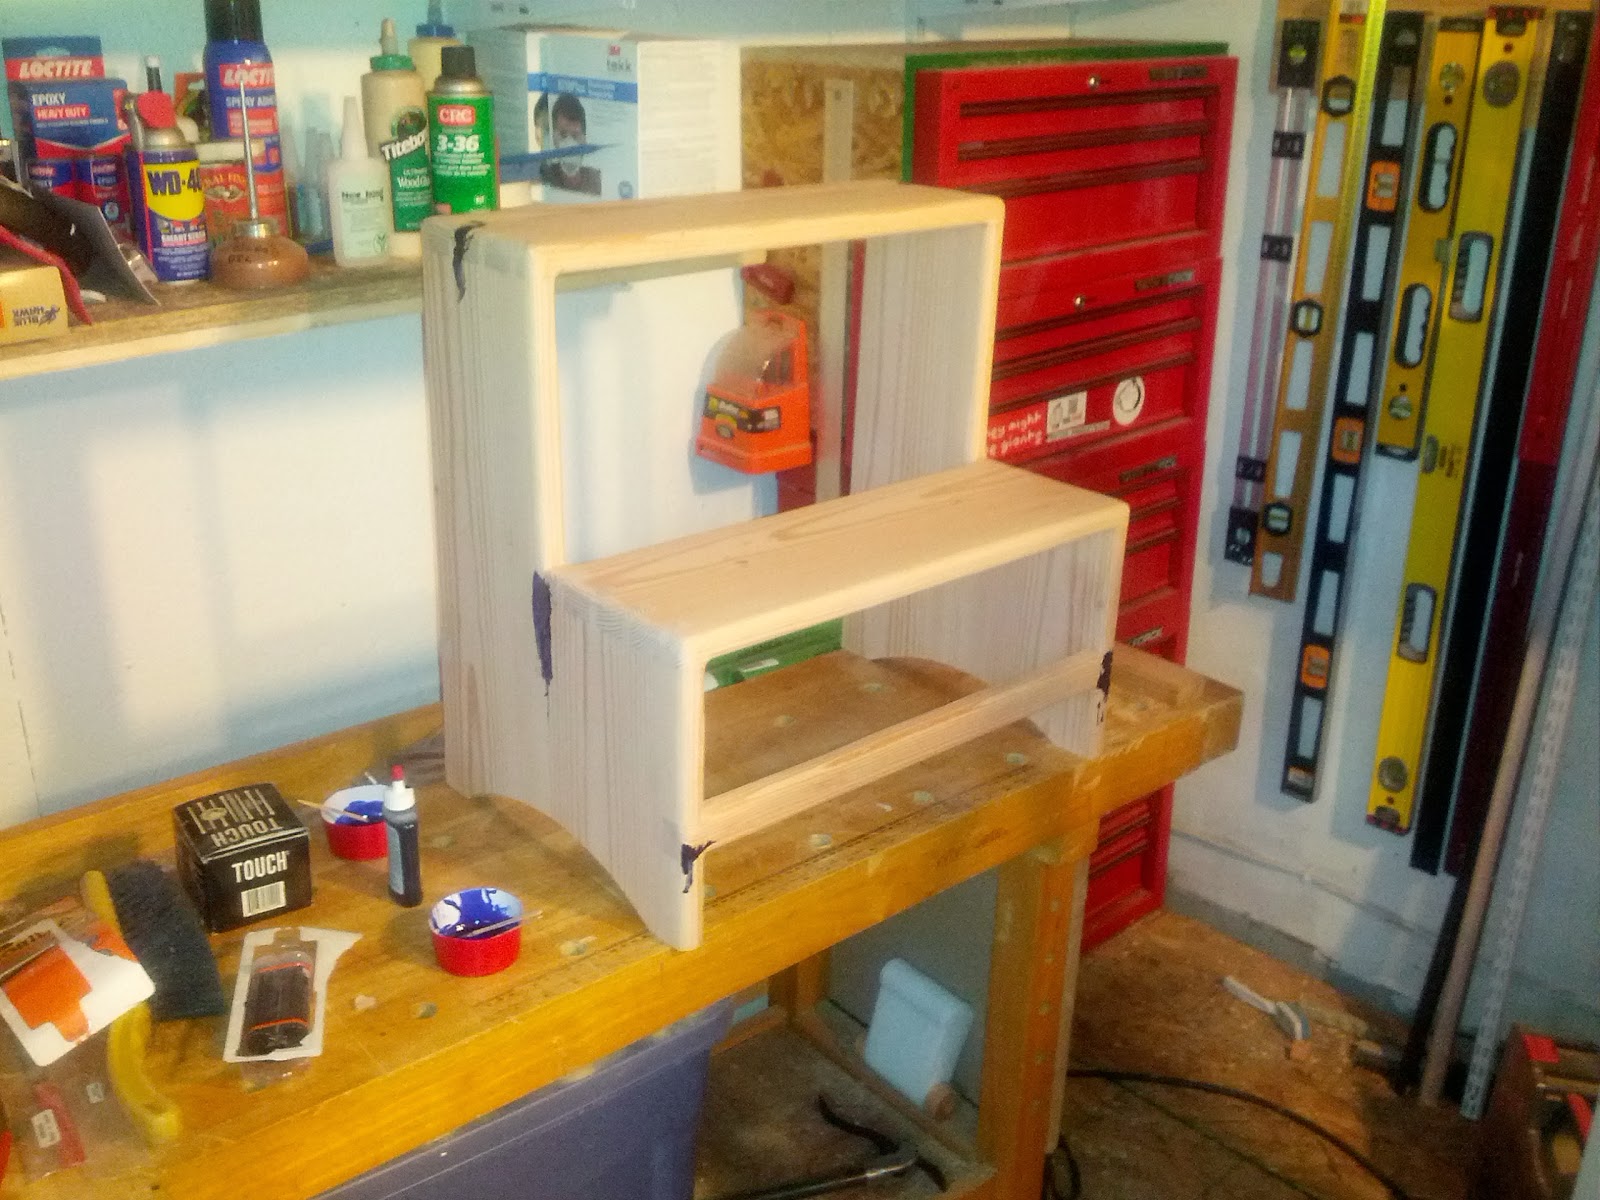
Thankfully, Ive been able to sneak in a bit of shop time. After finishing my wifes Tin Can Caddies & the Wand Racks, I had a clean(ish) bench and it was time to get back to work on the shop.
The insulation it coming.
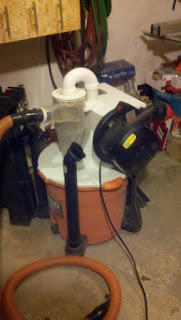
I didnt get too much done, but I did get the rigid polyisocyanurate aboard up. Hopefully Ill also get the spray foam done to air seal it before I have to go back to work.
One schedule I did keep during the holidays was our regularly scheduled MWA podcast. For the audio, check out iTunes or the MWA page.
I hope all my fellow woodworkers had an enjoyable and productive holiday season.
Read More..

Goodbye Village Carpenter You Will Be Missed

Kari Hultman was one of the world’s best woodworking bloggers until September 10, 2013 when she ended her blog at villagecarpenter.blogspot.com.
I’m lucky enough to call Kari my friend. She was the first blogger I met in person when I was just joining the online woodworking community. Even though at the time I couldn’t claim to be any more than an voyeur, watching from the outskirts of the community, Kari was nice enough to let me tour her shop and write about it. After we discussed the shop, she started showing me the tools she was just beginning to make for herself. As I would learn, this was Kari. She’s never stopped sharing her passion for the craft and love of learning and sharing out how to do it.
Since that first meeting my admiration for Kari has only grown - based both on the support she’s alchoices shown me and the stunning items to come out of her shop. Have you seen her homemade level, Sven, the Meditation Benches or the Pennsylvania German Sawbuck Table? I saw the table in person during the finishing process, and the photos don’t do it justice.
The Pensylvania German Sawbuck Table as I saw it, during the finishing process.
Karis photo of her beautiful table and the original.
Kari’s had The Village Carpenter for six (6) years. In that time she’s put out 538 posts, publishing three (3) per week during her most prolific period. If you’ve not read every one - even if you have - you owe yourself to go back and read them. From the first day, Kari put more thought and care into each post than may put into their entire blog. She’s discussed tool makers, toured museums and taken readers through the process of building projects and tools in an informative, illustrated, step-by-step manner that only Kari can.
I’m struggling not to say goodbye too much here, as Kari will continue to woodwork. Now she’ll get to do it at her own pace and for no one’s satisfaction but her own.
Well miss your post, Kari.
To Kari, I’ll miss reading The Village Carpenter. Thank you for all the posts, all the projects, welcoming everyone to the community and - most importantly - showing how we can all make what we want. I wish you and your family only the best. Thank you for the friendship you’ve shown me and my family. Thank you for the mouse poop covered wood. I can’t wait to see you again.
Thank you, Kari.
Read More..

Stephens Step Stool Part V

With the entire step stool now glued up I realized I hadn’t cut feet yet. I took my Lee Valley Drawing Bow and marked out a subtle curve in the middle of each leg. Once I cut out the curve with a jig saw, it left two (2) feet on each leg.
All ready for  feet.
Now with feet I took the step stool over to my router table. After the nasty incident with my neighbor during this stage of my last project, I setup my router table inside this time.
I removed the fence and used a bearing guided ¼” radius roundover bit, I ran every reachable edge of the stool (except the bottom) over it. This method took a bit of getting used too. With a bit of practice I soon found it easy as the stool is not so big as to hang completely off the router table yet is big enough to provide plenty of reference and holding surface.
Its starting to look curved.
Fresh off the router table the stool (or any piece having this roundover method used) is rounded, but not done. The routed curves on the edges are hard, disjointed and where they do flow into each other they have a shallow, machine cut look. I only use the router to hog off most of the waste, not to provide my final edges. After routing it is time for rasping.
My arsenal (and some additional).
As I’ve grown to enjoy the process and results of using rasps, my collection of rasps has grown. As I’ve used them more and more, favorites have emerged and others have fallen out of use. On Stephen’s Step Stool I did all my initial rasping using my Shinto 9” rasp. Though amazingly cheap, the woven blade is exceptional at coarse and medium rasping with efficient chip removal. Unlike other cheap rasps I’ve used, the Shinto does not leave tooth tracks (due to the woven blade).
The Shinto is wonderful at coarse work.
Next I used my Auriou #9 Cabinet Makers rasp. The Auriou further refines the curves while taking the coarse surface left by the Shinto and smoothing it to a much more consistent surface. Finally I used my new Gramercy 5” 25 tpi cabinet makers rasp. This Gramercy is delightfully light and leaves a very smooth surface (for a rasp).
With all the rasp work I do my goal is to further refine and flair the curves. I want them be organic, flowing and invite touch.
As transformative as the rasps are, even fine rasps leave a surface too coarse for finish. When I’m done with the rasps I switch to my Rotex sanders. I use an RO 125 and an RO 90. When setup on Rotex mode with an 80 or 120 grit sanding pad and set to speed 1, they do a wonderful job of removing the rasping marks. They also use the Festool Interface pads which allow the sanders to wrap the rounded edges and prevent flattening.
Gaps? What gaps?
After sanding the curved edges I added blue Transtint dye to 5-minute epoxy and filled in the few big gaps in the dovetails. Once the epoxy was dry I took out the sanders again, this time sanding the entire stool. I currently sand up through 220 grit, though I’m not completely satisfied with my sanding results. I’m not sure what changes I’ll make, but I’m considering going much higher in grit.Find all of the Step Stool posts here.
Dont forget about the +Modern Woodworkers Association Podcast. We talk woodworking with Guests from around the world of woodworking every other week. Subscribe to the RSS feed or iTunes today.
Read More..

The final coat of poly

The fourth and final coat of poly is done!  I am going to let it cure out in the garage for a couple of days and then rub out the finish and install it on Sunday.  I smoothed out one of my tester boards with steel wool last night and then applied some paste wax and it turned out great.  My original plan was to screw the hall tree to the wall next to the front door but my wife wants to be able to move it for cleaning so I am going to do some testing with cleats.  I dont want to actually hang the thing from the wall, just secure it enough to make sure its not going to fall on the 2 year old.  I am going to try making a french cleat and also make some rabbits in a couple of boards and see if I can get them to interlock the choice I want to.
I only applied the 4th coat to the outside parts.  I left the insides of the bottom shelves with just the 3 coats.
I just remembered that I havent bought the hooks yet.  I may have to stop by Home Depot on the choice home from work tonight.  My plan is to have 3 hooks under the top shelf, one on each side near the top and then one on each side near the bottom at backpack height.
I
?
Read More..

2013 A Year In Shop Tours

With my final shop tour of 2013 recently posting, Ive taken all my 2013 shop tours and combined them into a single playlist.
Here, presented for your amusement, is 2013: A Year In Shop Tours
Dont forget about the +Modern Woodworkers Association Podcast. We talk woodworking with Guests from around the world of woodworking every other week. Subscribe to the RSS feed or iTunes today.
Read More..

A House In The Trees Part XV

Last weekend I managed to escape from the busy summer and begin the corner board installation on the Tree House.
Gluing up the corner boards
As with any T1-11 sided building, the Treehouse needs corner boards to seal the nasty gaps where the T1-11 panels meet.
I began fabricating the corner boards by ripping 3/4" off of half the 1x6s I had. After assembly, the corner boards should be the same width on both faces. I hate it when lazy carpenters fail to rip one side, resulting in a corner board which is the width of a board on one side and the width + thickness of a board on the other.
After ripping, I glued up the corner boards with no fasteners. I did this so that when I was cutting them to fit, there would be no chance of hitting and exposing a screw or nail.
Once the glue was dry, I primed the inside and outside of the corner boards. They are made of simple, box store pine, so rot could be an issue. If Id waited until they had been installed, any water which did get behind them could easily rot into the bare wood. The primer doesnt make the rot proof, but it will help. I also primed the cut edges, prior to installation.
I dry fit each corner board and used relative dimensioning to mark them to exact length. A quick trip to the miter saw later, they were ready to install.
The first corner board is installed.
I put a double bead of M-1 sealant behind each side of the corner board, slid them into place and fastened them with screws. Before the final coloring, Ill apply another bead of M-1 to the exterior joint where the corner boards meet the T1-11.
Read More..

Sharpening a Scrub Plane Blade

The  scrub plane blade has an arc-profiled cutting edge, with  more or less  marked radius according to the job required. This profile makes it more difficult to sharpening by guides so many people prefer sharpening it by hand.
Im not very good at this job, so I searched for sharpening guides available that could serve the purpose. The Record 161 is a guide which is easy to find on ebayUK for few  pounds. It has only one central contact point (a rolling ball in the middle) and this permits to incline to the right and left allowing to follow the cutting edge profile easily.
The  blade is held firmly in place by a clamp screw that allows unrestricted iron orientation, useful even if it was necessary to sharpen skewed blade. The  dark side is that you have to ensure the correct blade position by hand.
For bigger curves the guide can be moved to the sides of the sharpening stone to allow for greater tilt, as seen in the short movie. The result was satisfactory with 35 ° bevel. To re-sharpen exactly to the same  angle Ill use a simple self made jig.
Read More..

That Giant Sucking Crushing Sound Part I

Hi. My name is Dyami and Im a Vacuumaholic. While Ive previously confessed my obsession with routers (Im now up to 9) I must also confess a somewhat smaller obsession with vacuums and dust collectors.
I have two (2) Dust Boy style dust collectors I picked up off Craigs list. Theyre both in the attic now, but an extension to the woodshop is planned to help fit them in. I also have a Ridgid portable "suitcase" style vacuum, a Shop Vac, a Ridgid Blower/Vac with Clear Vue Cyclone attachment and the requisite Festool CT22. Based on my current quasi completed shop setup, the Ridgid Blower/Vac with Clear Vue cyclone serves as the dust collection for my table saw, jointer & planer. It has a 16 gallon capacity, and I often fill it. Like you, I hate emptying it.
I hate emptying it so much that it got me thinking. While it would be much work to re-purpose the Clear Vue cyclone to fit a bigger container (and for what I paid for it, I dont think I could bring myself to modify it), Dust Deputy cyclones come as a kit and can be attached to any container. I ordered one and set to work.
My Ridgid blower/vac
ClearVue Cyclone
My elbow assembly to prevent kinking the vacuum hose.
Never one to shy achoice from over complicating a project, I decided that I needed to make some improvements on the suggest Dust Deputy set up. I began by picking up some schedule 40 PVC pipe and a few Ferncos. I wasnt happy with the idea of a vacuum hose kinking as it exists vertically from the top of the Dust Deputy. With the big elbow assembly I made, the hose now hangs from the PVC, eliminating the possibility of kinking.
My completed initial setup.
I then had to decide on a container. As I own a full complement of sheet metal tools (I used to be a sheet metal mechanic at work) I began with a simple metal garbage can. I had Tom Iovinos tale of the metal garbage can dust collection in my head as I cut the top and fit the Dust Deputy, yet I failed to pay it any heed.
When I finished the metal bodied Dust Deputy setup I connected it to my CT22 and began to vacuum. Instantly I realized than on all but the weakest settings the CT22 would deform the metal can. At this point I scrapped the metal can installation and went looking for a more rigid dust collection bin.
We’ll reveal what I came up with in the exiciting conclusion of That Giant Sucking (and Crushing) Sound. Until then, what sucks so badly in your shop that you had to scrap it?
Read More..

My Crozy Shop Floor Part II The Floor Part

Before getting to the OSB, I fastened the XPS panels to prevent them from shifting. I secured each of the 2 x 8 XPS panels with two (2) Tapcons into the underlying concrete floor. Thats not enough for permanent attachment, but since Id be attaching the OSB through the XPS, it only needed to be attached enough to hold still while I installed it. I started every other row of XPS with a half sheet so that though there were many joints where three (3) panels met, there were no four (4) panel joints.
The corded PC impact driver burnt out after
driving about 2 dozen Tapcons.
After the XPS, I installed the 3/4" tongue and groove OSB. I used a half sheet of OSB on every other row also to achieve the same 3 panel joints. Each sheet of OSB was fastened through the XPS into the concrete with 18 tapcons in a 4-3-4-3-4 patten, installed along the factory markings which are painted on the OSB to help identify where the framing is for typical installations. This left me with a floor fastened every 1.7’ on center. It shouldn’t be going anywhere.
Its beginning to look like a floor.
With the XPS installed to 7-1/2” from the garage door and the OSB installed to 12” from the edge of the XPS I called it a day on installing the floor. I has hoped to also make the threshold which will fit in the 7-1/2” space, but I realized too late that my planer was stuck in my living room, surrounded by the other workshop paraphernalia.
The next morning, after I picked up my new jointer, I began the long task of loading all of the tools into the shop by myself. By the time my wife got home in the early afternoon, the only thing left in the living room was my work bench.
Reloaded with the contents of my shop.
Though I still need to build the threshold and tie it into the OSB I’ve spent the few weeks since the floor was installed coloring the walls and setting the shop back up. In that time, I’ve already come to appreciate how nice working on the new floor is. When I step from the concrete at the door to the OSB I can immediately feel how firm and soft the new floor is.
Though I’m far from finished, it’s absolutely delightful to be able to reach a
Read More..

Kid sized table

I was able to spend a couple hours working on the boys table on Sunday.  I cut the table top down to 23" square and rounded over the sides on the router with a 1/4" roundover bit.  I also cut the table legs to 2" square with a 45 degree notch cut out of the back.  I also rounded over the front edges and rounded over the bottom of the stretchers.  Next is gluing the legs and stretchers together and then sanding, sanding, sanding.  Im still debating on what color to stain everything.  I tested a couple of colors on some scrap wood last night and didnt like them very much.
?
Read More..

Woodworking Mallet

I had to stay home with my sick son on Friday so while he was taking a nap I was able to finally start on my Wood Working for Mere Mortals woodworking mallet.  I bought enough material to make 2 mallets so the first one is pretty much going to be just like the one Steve made in his video and the second one will be more personalized to my style.  It all depends on what I learn while making the fist one.  I bought 2 - 1x2x2s and 2 - 1x3x2s.  1 each in maple and 1 each in Oak. The first mallet I am making is with an Oak head and Maple handle.  The second will be reversed.  This will also be my first project not involving Pine.
You can view Steve Ramseys video here
http://www.youtube.com/watch?v=JcaV5jWpR1k&feature=g-user-u
I started by cutting the maple 1x2x2 in half to glue together to make the handle.  I cut the oak 1x3x2 into 3 pieces. 2 at about 8 inches and 1 at about 6 inches.  I took the 6 inch piece and measured in 2 inches and marked the center.  I then realized that the board was 2 1/2 inches wide so I remeasured to 2 1/2 inches and re-marked the center.
I made a 1 1/2 inch hole to be able to add some weight to the mallet.
It turns out that speed really does matter.  The drill press came setup at the max speed of 3100 RPM.
I changed it to the middle setting of 1720 when I assembled the drill press. 
I cut the hole on the right at 1720 and it kept stopping as I lowered the Forstner bit
and it also burned the wood some. 
I adjusted the belts down to the lowest setting of 620 and drilled the hole on the left with no issues.
I set my mitre saw to 2 degrees to cut the inside of the wedge.
I flipped the board over to cut the other side.  The piece of wood was pretty small so I used the push
stick from my table saw to hold it in place when I cut it.
The wedge is where the handle will go with the narrow part at the bottom and the wide part on top.
I am gluing one side to another 1x3 board.
I am using the second board for clamping only.  No glue.
I am making the handle out of 2 1x2 pieces of maple glued together.
I let the glue dry for about 2 hours and then removed the clamps.
BBs to give it a little more weight.  I estimate that I should be able to make about 5 mallets
with this container of BBs.
Now to glue the second piece on.
?
Read More..